Create your Contrax Wallet
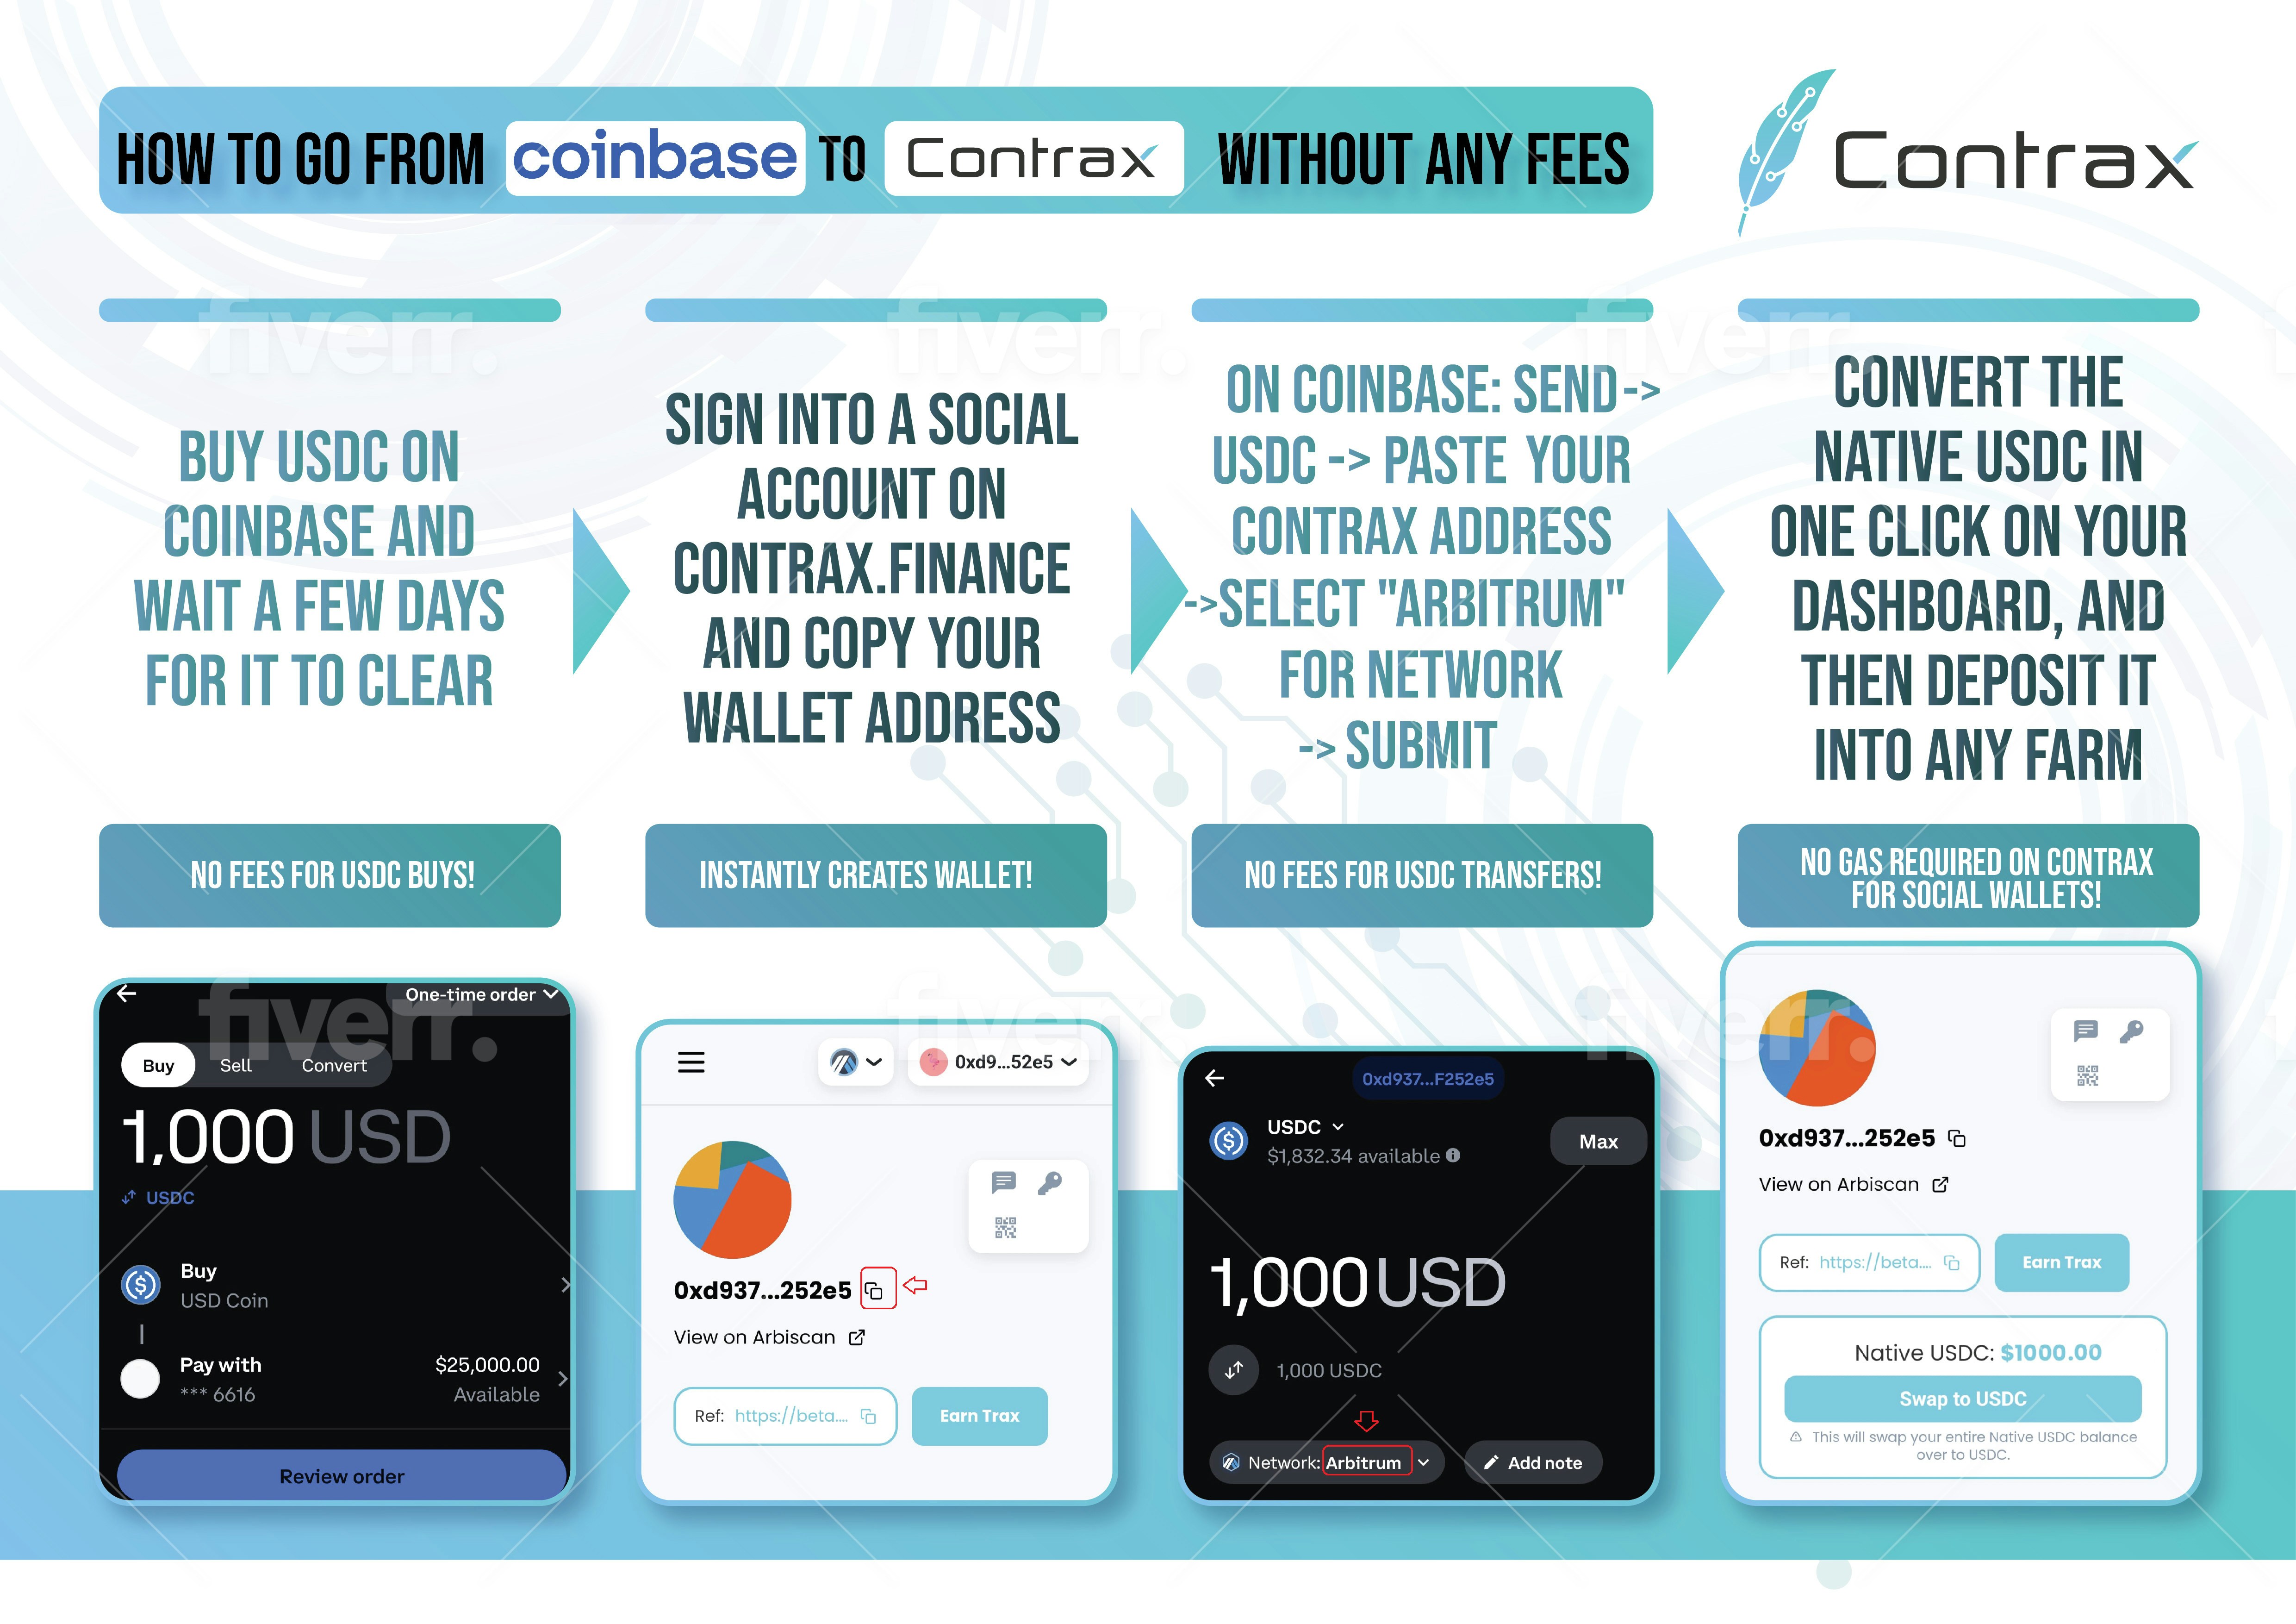
Transfer from Coinbase to Contrax
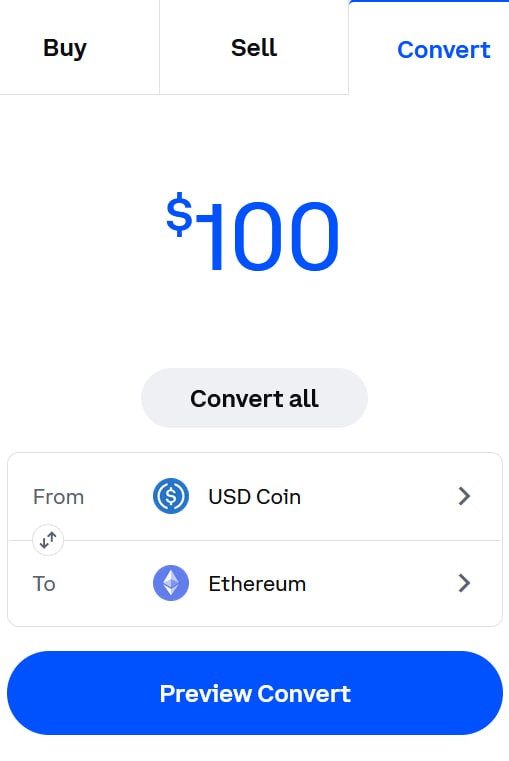
- If you do not have your assets in ETH or USDC, convert to it using the “convert” tab, or you can buy USDC without fees on Coinbase. You just need to wait a few days for it be transferable.
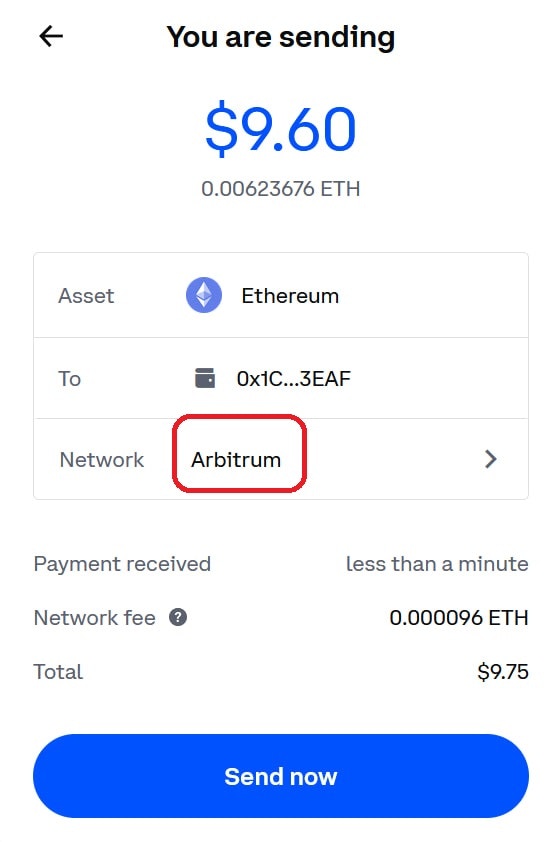
- In the “send” tab, choose “Ethereum” as your asset. For “To”, paste in your wallet address. To get your wallet address, copy it as explained here when you created your wallet. Then, click “Continue.”
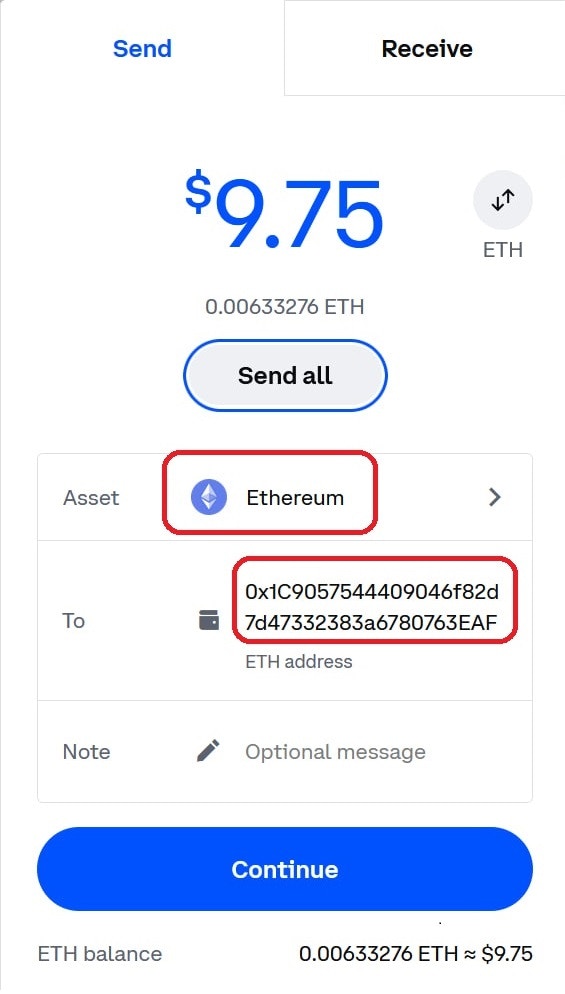
- Be sure that you select “Arbitrum” as your network. Note: If you do not see “Arbitrum” as a network choice, you will have to select “Ethereum” and then do a few extra steps on Contrax to vault.
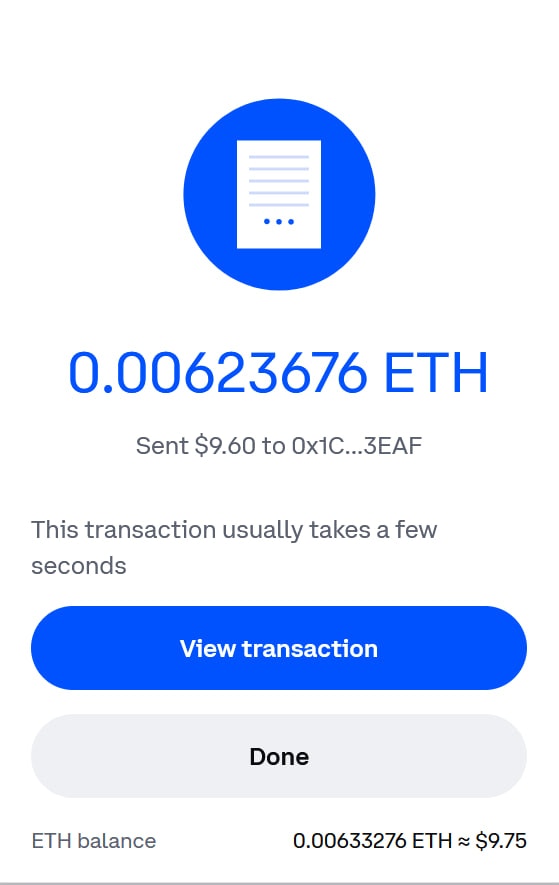
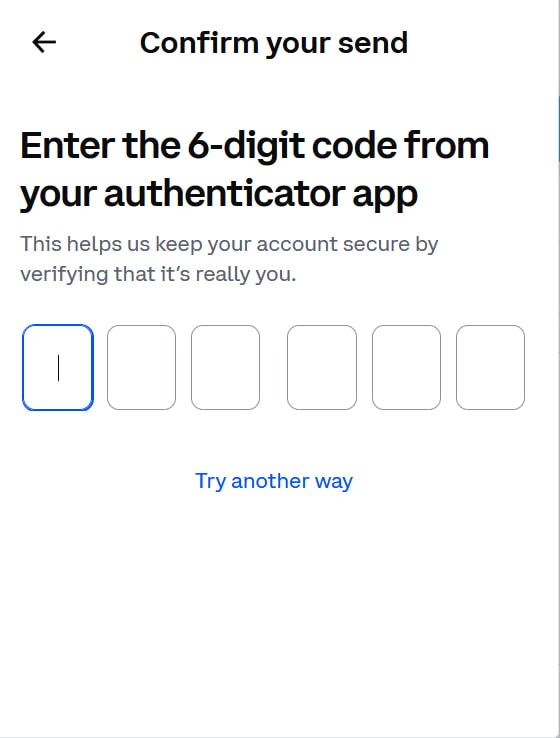
- Enter your two factor authentication to confirm the transfer.
- That’s it! Your ETH or USDC will be sent to your Contrax wallet. Give it about a minute, and then check your dashboard. Be sure to log into Contrax with the same account you copied the address from. You will see your funds on the dashboard. Note: If sent USDC, you will just have to click the “Swap USDC” on the dasboard to get it USDC.e, the right form for Contrax.